Making Your Own Apple Cider

It is very easy to make and can your own apple cider.  Actually, if you are making applesauce, you can have extra juice from cooking the apples.  This is an easy recipe for making apple cider, although it is called apple cider, it is not fermented.  This will turn out much tastier than any store bought apple cider and by selecting the right kind of apples to use the cider will be so sweet it will not need any sugar, making it actually healthy for, unlike many store bought ciders.
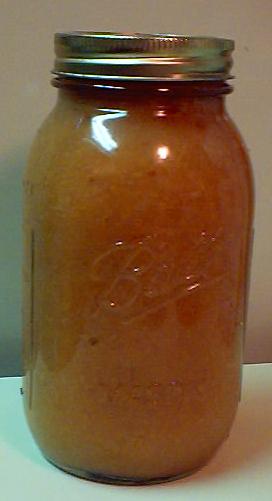
Apple Cider

The difference between cider and apple juice is that apple cider is raw apple juice that has not undergone any filtration and will still have some coarse particles.

Prepared using this recipe, your jars of apple cider should have a shelf life of 18 months to 2 years, all without any special attention at all.


Directions for Making Cider

Ingredients and Equipment

  • Apples
  • Filters (Cheese cloth, coffee filters, etc   SKU: 006201780
  • Water bath canner  SKU: 009420267
  • Jar Grabber (for hot jars) SKU: 006200341
  • Ball Jars  SKU: 001280011
  • Lid lifter   SKU:009400821
  • Jar funnel SKU: 006200396
  • Large spoon or ladle  SKU: 006201049
  • At least 1 large pot  SKU: 009420267
  • Sieve (metal/plastic sieve or colander)  SKU: 006202307


Recipe and Directions


Step 1- Selecting the apples: This is the most crucial step to entire process, because you will need sweet apples so that you do not need to add any sugar.  Apples like Red Delicious, Gala, Fuji, and Rome are great for cider, and make sure you use a mixture instead of all one type.  Honeycrisp and Pink Lady are also wonderfully sweet apples.


Step 2-How many apples and where do I get them?  You can always pick your own, or get them from your local grocer.  Although many people do enjoy going to their local farmer’s market or orchard for bulk purchases (I also have always felt these are the places to go for the freshest produce).  You will yield about 12 to 20 quarts of cider for every bushel of apples, although it is safe to count on 15-16 quarts.


Step 3-Wash the Jars and Lids:  It is important to have your jars and lids already cleaned by the time you start the cider making process so you are not challenged with the task of doing everything at the same time.  I would recommend using the sanitize cycle in your dishwasher, but if you do not have a dishwasher with a sanitize cycle, you can wash the containers in hot, soapy water and rinse, then sanitize the jars by boiling them 10 minutes, and keep the jars in hot water until they are used.  Keeping them hot will prevent them from breaking when you fill them with cider.  Put the lids into a pan of hot, but not quite boiling water for 5 minutes and use the lid lifter to pull them out.


Step 4-Wash and cut the apples: Wash apples in plain cold water, and chop them without peeling them.


Step 5-Cook the apples:  In a larger, thick-bottomed pot, put about 4 inches of water and a good portion of apples (make sure they are completely immersed) into the pot and heat on high with the lid on.  Once it begins to steadily boil turn the heat to medium until the apples are soft all the way through.  If you have an electric juicer, simply juice the chopped apples and skip to step 7.


Step 6-Sieve the cooked apples:  There are quite a few ways to separate the juice from the pulp, skins, seeds, stems, etc.

How to Make Your Own Chalk Paint

I’m sure you have seen all the amazing chalk paint projects. Folks find old chairs, benches, tables, or other pieces of furniture found a garage sales or flea markets. Chalk paint gives surfaces a matte, distressed, or antique look. To save some money and create eye-catching, aged pieces, use this recipe to make your own chalk paint at home.

Freezing Your Own Vegetables


If your garden has produced more vegetables than you can eat or know what to do with, you may want to consider freezing the excess harvest in order to enjoy your hard work later on in the year.  Most garden veggies can be frozen and will keep well if stored properly in airtight containers.  When freezing veggies always start with the highest quality of your yield to ensure best results and you will also need to blanch most veggies using boiling water or steam before loading up your freezer.


Steps

Preparing the Veggies

  1. Select young, freshly picked veggies.  Garden veggies that have already been sitting out for several days will lose some of their freshness, and freezing may cause them to lose additional flavor.  To ensure that the vegetables stay fresh for as long as possible, choose vegetables that are just barely ripe or slightly unripe.  Steer clear of overripe veggies which may go bad even when frozen.
  2. Avoid veggies with blemishes, bruises, and soft spots.  If you do use damaged garden veggies, remove these damaged spots before beginning the process.
  3. Wash your vegetables.  Even if the garden they came from is organic and free of potentially harmful pesticides, they will still be covered in dirt and bacteria.  If necessary, use a potato brush to gently scrub away any stuck-on grime.
  4. Cut up your veggies.  Remove any non-edible parts and chop the veggies into your preferred size for eventual serving.

Water Blanching

  1.  Fill a large pot with at least 1 to 2 gallons of water.  A blancher pot, which holds 6 to 8 quarts of water and contains a perforated basket for holding food works best, but any large pot that comes with a lid will also work.
  2. Boil the water over high heat.  The water should reach a full boil before you add your veggies.
  3. Place 1 lb of your prepared veggies into a metal steaming basket.  A wire-mesh strainer or cheesecloth may also work.
  4. Lower the veggies into the water.  Make sure they are completely immersed.
  5. Cover your pot with a lid.  Boil the veggies for as long as necessary according to expert boiling times.  These do vary.  For instance, cut corn takes 5 minutes while asparagus takes only 4.
  6. Remove the veggies from the pot and immediately transfer to large container of ice water.  By shocking the veggies with ice water, you halt the cooking process and preserve the color of the veggies.  Keep the veggies in the cold water for the same amount of time as you boiled them.  Water must be at least below 60 degrees Fahrenheit and use approximately 1 pint of water for each pound of veggies.
  7. Drain veggies completely.

Steam Blanching

  1. Boil 1 to 2 inches of water in large pot.  You need a pot that has a lid and fits an interior rack.  The rack must be positioned 3 inches or more above the bottom of the pot.
  2. Place a single layer of prepared veggies in a steaming basket or cheesecloth bag.  Do not pile the veggies so the steam can be evenly distributed.  Asparagus, broccoli, and chili peppers do the best using this method.
  3. Set basket onto rack.  Cover the pot and continue heating for as long as necessary for each veggie.
  4. Remove veggies from the pot.  Shock veggies by transferring to ice bath.  Allow ice bath for as long as steam.
  5. Drain veggies completely using strainer or large pasta drainer.

Packing and storing

  1. Lay blanched, drained veggies flat on shallow tray.  Veggies should be arranged loosely in a single layer and should not overlap.
  2. Place the tray in the freezer.  Wait until the veggies are firm before removing tray.
  3. Fill freezer bags or freezer containers with frozen veggies.  You must leave an appropriate amount of empty space to allow food a chance to expand as it freezes.
  4. Label each bag/container with a felt tip marker.  Write down the contents of the package and the date food was frozen.
  5. Place the sealed, labeled packages into your freezer.  For best results, only pack 2 to 3 pounds of veggies for each cubic foot.  If the veggies are packed any tighter than that, they may take too long to freeze.
  6. Keep the temp of your freezer set at 0 degrees Fahrenheit.  The majority of garden veggies will retain their freshness, taste, and nutritional value for a year or longer if kept at this temperature.

Tips

  • Start with easy-to-freeze veggies if you are new to the process.  These include green beans, carrots, peas, peppers, squash, and sweet corn.
  • If freezing your garden veggies goes well, consider freezing fruits as well.  Most fruits freeze well, especially those in the berry family.
  • Make sure to look up the exact recommendations for each garden veggie before blanching and packing.  Each veggie has its own specifications concerning selection, preparation, blanching method, blanching time, and packing method.  Under-blanching may stimulate the enzymes inside the veggies, causing them to decay.  Over-blanching may cause your fresh garden veggies to lose nutritional value and flavor.
  • Avoid freezing garden veggies that are almost always eaten raw, like celery, lettuce, and cucumbers.  These veggies do not survive the blanching and freezing process well.  However, veggies that can either be eaten raw or cooked, like carrots, do very well in the freezing process.

Things You Will Need

  • Knife  (Buffalo Tools Butcher’s Knife Set MPKS10; SKU 10555224)
  • Blancher  (Columbian Home Products, 7.5 qt Canning Blancher 6140-4; SKU 9420869)
  • Steaming basket (Norpro, Stainless Steel Vegetable Steamer 175; SKU 6201227)
  • Cheesecloth bag (Norpro, 36” Cheesecloth 357; SKU 6201780)
  • Freezer bags (Ziploc, 1gal Freezer bags 00389; SKU 6660761)
  • Freezer containers  (Ball 8oz Plastic Freezer Jars; SKU 1281200)Freezer Containers
  • Shallow trays (Wilton Recipe Right Cookie Sheet; SKU 17480257)
  • Felt tip marker (Sharpie Black Single 35010-SH; SKU 4215590)